Make Your Own Infrared Security System Using a Simple Webcam

There may have been times when you wanted to have your own infrared security system to monitor the perimeter of your house. The problem is that night vision cameras and illuminators can cause a huge dent in your pocket and so you decided to put your plans on the back burner. Well, you may want to bring that plan back to life again because there is an inexpensive way to have your own home made security system.

Soldering Gun

You just need a simple webcam, preferably the cheap ones. You would also need some used film negatives, a couple of high intensity infrared LEDs which you can get from any electronics store for less than a dollar, a power device for your LED lights which you can get for less than ten dollars, some cardboard, polarity wires, an electronic bread board, and tools like a soldering gun.

Soldering Gun

First, you have to open the webcam by unscrewing its plastic casing. Then try to remove the webcam's lens assembly from the holder. On some cameras, this is screwed on the assembly, while on other cameras, it just kind of snaps into place.

Once you have taken off the lens, you should see a small square shaped glass stuck at the bottom. That would be the red-tinted infrared filter of the webcam, the one that stops IR light from being captured by the webcam's sensor. Remove this filter carefully with a penknife by slowly scratching the glue off its edges and then levering it out with the same knife.

Replace the IR filter with a used negative, preferably the blackest that you can find, and cut it to two pieces of approximately the same size of the IR filter you took out. Fit these two pieces of cut film into the slot where the IR filter used to be. Carefully affix your new filter with quick drying glue, taking care not to spill some of the glue onto the webcam's lens or on the 2 pieces of negatives.

Put the lens back on the webcam and reassemble the rest of the parts. Then, connect the camera to your computer and see if it can still detect any color. Next, try to put eight high intensity infrared LEDs on a bread-board and connect it using a series-wiring configuration. Make sure the polarity of each LED corresponds to the other and then have it insulated by a thin electrical tape. Attach this assembly to a strong cardboard and connect it to a power supply.

Try to focus your reconfigured webcam to the lights to see if it is powered on. If everything works according to plan, attach these two assemblies on another cardboard by putting the camera on top and the illuminator at the bottom.

Now, you have a working assembly of a near infrared security camera with an illuminator. The best thing about this is it will cost only about forty to fifty dollars. How is that for half an hour's task?

Make Your Own Infrared Security System Using a Simple Webcam
Soldering Gun

Android Tablet Device Portable Digital Media Player 9 Inch Tv Monitor

Do it Yourself Solar System - Solar Power Made Easy, and Much Cheaper Too!

Ever looked into purchasing a solar power system for your home? Ever searched the internet for those "do it yourself solar system" kits, just to find a solar dealer that put together a package that costs about ,000, ships you the materials, and you are on your own?

Soldering Gun

That is a daunting task even for the most handy of do it yoursefer's, as you do not receive any type plan or considerations to build such a system, let alone be cost effective.

Soldering Gun

There are definitely some things to consider from a do it yourself standpoint before considering installing a do it yourself solar system.

Are you willing to climb on your roof to install solar panels? Spending time on your roof is part of the process of building a solar power system. The hardest part is actually getting up there. Once you can get over that, the installation of the solar panel is a breeze. It is as simple as connecting the brackets to a support beam in the roof, and connecting the solar panels to the brackets.

Do you have an open view to the south on your roof for maximum solar exposure? In order for photovoltaic cells to produce the most electricity for your home, they must face the southern sky. If you have large trees blocking the way, then alternatives can be considered, such as building a solar stand that has an unobstructed view of the southern sky for maximum exposure.

Are you willing to save money by building your own solar panels? This is a no-brainer, as the cost of building a solar panel can be done for about 0, if you shop around properly, and purchase bulk lots of solar cells off of the internet. I once found a bulk lot of 72 solar cells for about . That's more than enough solar cells to start your do it yourself solar system, and this price pales in comparison to the hundreds, even thousands of dollars a manufactured panel costs.
Can you follow step by step directions and videos?

If you answered yes to the above questions, then you are well on your way to building your own solar power system for your home.

There are many do it yourself solar system designs on the market today, all of which are designed to take the guesswork out of building solar panels, installing the solar panels, and wiring the solar panel systems into your home for a fraction of the cost of purchasing ready-made solar panels, and having someone come to your home to install them.

I made my first attempt at building a solar panel, and it was much easier than I anticipated. Once I ordered my materials (the solar cells) and picked up a little bit of parts from my local hardware store, the construction was very simple. First I measured the size and arrangement of the solar cells. From there, I got my dimensions to build the frame to mount the solar cells. Next the frame was actually constructed. The next step, which was the toughest (and at the same time, was still easy), was soldering the solar cells together. This was about as tricky as using a hot glue gun and making a relatively straight line. Once I got the solar cells all pieced together, I added them to the frame and secured them. After that, the solar cells were wired together, and the cover to the frame was added. Voila! A solar panel. I tested it, and it was generating the necessary wattage (18 volts) and was working fine.

All of this took me about 6 hours to do, since it was my first one, and a cost of about 0. This definitely did not take very long, and once the solar cell is connected into my house wiring, it will take maybe two months of generating electricity for the solar panel to pay for itself. Not too bad!

I was shocked, but I realized that a do it yourself solar system is definitely within anyone's reach, as I am not the most "handyman" of people to begin with. I'll soon be building my second solar panel to add to my do it yourself solar system, and be on my way to making a huge dent in my electric bill.

Do it Yourself Solar System - Solar Power Made Easy, and Much Cheaper Too!
Soldering Gun

Mclane Reel Mowers 3D Home Theater

Is Your Headphone Jack Plug Giving You Problems?

You are doing your favorite activity and listening to music on your headphones. Suddenly the music just stops or its interrupted with a loud crackle. How annoying! Weather it is your old Sony Walkman, MP3 player, new Apple iPod, iPhone, iPad or your lovely laptop, the thought of an audio malfunction could be shocking. Most likely your audio interruption is caused by a problem with your Headphone Jack Plug.

Soldering Gun

Sometimes it's the simple things that count. With all the complicated circuitry and programs going on inside today's audio capable gadgets, it may be the common headphone jack that causes the most problems. A set of headphones and the headphone jack gives us the capability auditory interaction with today's popular electronic devices. Depending on the type, a headphone jack costs anywhere from a fraction of a dollar to a few dollars. That is why it can be very frustrating when you realize you may have paid hundreds of dollars for an electro-gadget that doesn't work because of a relatively cheap!

Soldering Gun

The term headphone jack or headphone plug refers to both male and female metal connectors that come in various sizes. The most common sizes are a 6.35mm or 1/4" jack, 3.5mm miniature jack and a 2.5mm sub-miniature jack. The malfunction of a simple headphone jack can be a big headache.

There are a few different causes for its malfunction. The female part of a headphone jack is most prone to causing a failure because it us an opening into the inner circuitry of any device that has one. Allowing sand, dust or water to get inside could cause a problem. Some of today's latest audio devices have a "moisture" detection sensor. If liquid or excessive moisture gets inside the headphone jack, a small LED light will change from white to red to indicate unacceptable moisture levels. Such indication may cause the device to shut down in an attempt to avoid further damage. Another common cause of headphone jack failure is a bad connection do to the spreading of the internal metal contacts. This is the reason for most repair requests or returns for MP3s, cell phones and iPods. It has been noted as one of the most discouraging problems for audio technicians. Technicians have stated that it is a shame that such beautifully designed devices fail because of a jack malfunction.

So, what can be done to avoid and/or repair a problem with headphone jacks? If you think dirt or dust got into the jack, you could try blowing out the jack hole. You can blow into the hole yourself or buy a can of compressed air commonly sold in electronic and computer stores that are made specifically for cleaning electronic devices. If you think liquid or moisture got into the hole, just let it sit for a while in a dry warm place for a couple of days, the device might dry out and begin working properly. If none of these works and your device is under warranty, send it back to the manufacturer for repair.

Although not recommended, you could try a do it yourself fix. To do this, remove the cover of your device. This may require you to remove a number of screws around the perimeter of the cover. If you have soldering skills you can remove the old solder from the jack by heating up the old solder with a soldering gun and tabbing it off with a toothpick. Then apply new solder using proper soldering technique. If you do not know how to solder try cleaning jack connectors with an alcohol swab. Test your device to see if it works. If not, you may want to re-solder the connections. Soldering properly requires some skill.

If all of the above methods do not resolve your jack problem, your best bet may be to send it back to the manufacturer for a repair. Follow the instructions in your user manual for the repair process. But there are ways to avoid problems with your headphone jacks. Be gentle when inserting the male jack into the female receptor. Angling when injecting may cause the female connectors to spread, thus causing a loose connection, which may require constant jiggling. Use device clips to secure your device to your belt or pocket to avoid pulling on the jack if your device falls or is pulled.

Sometimes the best way to avoid jack damage is prevention. Some devices come with jack covers but others do not. If you have a device that does not have a headphone jack cover you can buy one at your electronics store or go on-line and search for "headphone jack cover". Protect your investment, avoid dust and moisture and get a cover if you don't have one.

Is Your Headphone Jack Plug Giving You Problems?
Soldering Gun

Black Friday 100W 5pc Soldering Gun KiT: Cutter:Flux:Solder:Case 2011 Deals

Nov 19, 2011 03:38:33

Black Friday 100W 5pc Soldering Gun KiT: Cutter:Flux:Solder:Case Deals
Click for larger image and other views

100W 5pc Soldering Gun KiT: Cutter:Flux:Solder:Case

>> Click here to update Black Friday prices for 100W 5pc Soldering Gun KiT: Cutter:Flux:Solder:Case <<


Black Friday 100W 5pc Soldering Gun KiT: Cutter:Flux:Solder:Case Overview

Brand New 100 Watt Soldering Gun Kit 110 Volts / 60 HZ Power: 100 Watts 2 Extra Cutters Container of Flux Tube of Solder/Wire Gun has light bulb for easy viewing during solder Includes a Blow Mold Carry Case


SAVE NOW on Black Friday offers below!

Available In Stock.

This Black Friday 100W 5pc Soldering Gun KiT: Cutter:Flux:Solder:Case ships for FREE with Super Saver Shipping.

Price : Click to Check Update Prices Please.

100W 5pc Soldering Gun KiT: Cutter:Flux:Solder:Case

Limited Offer Today!! 100W 5pc Soldering Gun KiT: Cutter:Flux:Solder:Case Black Friday and Cyber Monday 2011 Deals

Projector Short Throw Supplements For Muscle Growth Digital Pen

How to Build an Economical Speaker Box

Speaker boxes are used to house several component subwoofers and other speakers in an enclosure. Although most subwoofers are sold separately, you might want to put them into one box or enclosure hence the use of a speaker box. Speaker boxes are not hard to build but are very challenging for if done correctly they can help enhance the output of stereo source. For those who are not so good with craftwork can certainly order the sub woofers already pre-enclosed.

Soldering Gun

What is needed in order to build a speaker box?

Soldering Gun

It all depends on your budget and intent of the speaker boxes. You have to determine the size and the materials used. The best material that you can use is a ¾ inch medium density filter board. If you have the cash to spare, you can opt for more exotic materials but most people use fiberboard.

Aside from the fiberboard, you will also need: a jigsaw (a bladed cutting power tool), a power drill, a spiral but, a ¾-inch bit, a router, sand paper, spray glue, solder gun and ammo, and some carpet if you want to cover the speaker box.

Most subwoofers on the market come with a set of optional instructions that let you design an enclosure for it. No need to figure out the dimensions when a set of measurements have already been included in the package. In this case it means that you won't have to go through trial and error designing an enclosure since it has the common specs for most speaker boxes.

One important thing you have to realize is that if the measurements are given on an interior measurement, you might have to adjust the measurements by as much as ¾-inch.

It is also ideal to trace your desired design and size measurements on the filter board rather than doing any freehand cutting. Avoid using markers for they can be unsightly if the speaker boxes are not covered with carpet.

For obvious reasons, you have to use your jigsaw to cut the design and not a knife or other cutting tool. The jigsaw lets you curt clean and neat. Once the pieces have been cut out, it is a good idea to make a trace of where the speakers would go into. In order for you to do this you would have to use a router. Once you have used the router to cut the holes, you would have to use sand paper to smoothen the holes made.

You should also look into creating holes so that the necessary cables can pass through. If the template or instructions do not have any notes for holes, it is best to create 2 inch holes on either side of the speaker box. Always sand them through so that there are no snags when done.

After the holes have been cut, you can now assemble the boards together. Using screws, nuts and washers, you have to make sure that they fit tight and don't rattle. Always leave the front of the box last so that any last minute works can be dealt with.

The next part is the easiest for all you have to do is out the subwoofers in, close the front panel, and plug the power and connectors in.

The real workload is in the construction of the speaker box and that being said, you have to make sure that the work done is up to precise and exact.

How to Build an Economical Speaker Box
Soldering Gun

European Baby Strollers Panasonic Stereo Systems Bernzomatic Micro Torch

Installing a Killswitch

The killswitch is possibly one of the biggest fads in recent guitar history. Ever since Buckethead's "Jordan" appeared in Guitar Hero II, guitarists everywhere have latched on to this simple, yet amazing modification. However, many people have no idea what a killswitch is, let alone how to install one onto a guitar.

Soldering Gun

What is a killswitch, and how does it work?

Soldering Gun

Really, the name tells you the basics of the modification. A killswitch is a "switch" that "kills" the sound. When you put the switch in one position, the guitar is silent, while in another position, the guitar makes sound. Simple enough, right? Not quite...

Many amateur electricians will try to wire the killswitch in such a way as to "cut" the signal. In a perfect world, that would work. You could simply disconnect the wires, and there would be silence. Unfortunately, our world is far from perfection, so doing that will give you more problems than it's worth. Instead, the signal needs to be grounded, which will produce the same basic effect, without the undesired consequences.

What materials do I need?

1. A switch of your choosing. This can be a headache on its own. For the inexperienced, picking out of the thousands of switches available at their nearest Radioshack can be tedious, to say the least. Preferably, go for a SPST Normally Open (N.O.). If you are looking for a Buckethead-style killswitch, look for a momentary push-button. If Tom Morello is closer to your style, pick up a standard toggle switch.

2. Wire. I used speaker wire, but any insulated wiring should do fine.

3. Soldering iron. Obviously, since we are installing electrical components in a guitar, we are going to need the ability to solder. Any soldering iron will do, though for safety concerns, I prefer a soldering gun.

4. A drill, and the proper bit size. This varies, depending on the size of switch you buy. Just remember, you can always increase the size of the hole, but never decrease it.

Installing the Killswitch

Start off by drilling your hole in the pickguard. Basically, just use common sense here. Make sure you're using the right size drill bit, make sure you have room in that spot for your switch, etc. Once you have the hole drilled, go ahead and put the killswitch into place. With the killswitch in place, go ahead and start heating up your soldering iron. Before we actually start soldering, however, I want to show you two pictures, because they illustrate what to do and what NOT to do.

The first picture: what to do with a N.O. (normally open) switch. As far as electronics are concerned, when two points are connected, they become the same point. Therefore, when you look at this diagram, you noticed that when the switch is activated, the hot (red) wire becomes grounded (green), thus silencing the guitar. This is by far the safest and most effective way to wire a killswitch. Unfortunately, the website also demonstrates a method you should NEVER use to wire a killswitch, or anything at all, for that matter.

Usually, we try not to bash other websites, but when something is blatantly wrong and/or dangerous, something has to be said about it. This diagram supposedly shows how you are supposed to wire a killswitch using a N.C. (normally closed) switch. From a practical, guitarist standpoint, using this wiring would not silence your guitar; it would do the exact opposite. Hitting this switch the way it is set would cause an obnoxious hum, one that even shielding your guitar could not fix, to come out of your amplifier, similar to unplugging your guitar and touching it to a piece of metal. On top of that, disconnecting the ground is the last thing you ever want to do with electronics. Why, you ask? Electricity always looks for the path of least resistance to the ground. If it is cut off from the intended ground, you become a potential target, thus increasing the risk for electrical shock. If you insist on using a N.C. switch, you would want to cut the power wire, but even that will give less than desirable results. Your best bet is to use the first diagram, using a N.O. switch. Even with this, however, there is one issue...

HELP! My killswitch pops!

Most tutorials don't teach you how to fix this mod's unfortunate side effect - the killswitch pops each time you press it. There are two ways to remedy the situation. The first way is the easiest: turn up the distortion. With enough distortion, the popping will be drowned out. However, this is just a band-aid for the real problem: the wiring. Rumor has it that putting a high-value resistor (greater than 2M) between the lugs on the switch will stop the popping, though I have yet to get my hands on such a resistor, and have yet to hear a definitive answer on the subject. However, as soon as I try it out, I will post it here.

Do you have other suggestions for our killswitch enthusiasts? Be sure to leave us a comment!

Installing a Killswitch
Soldering Gun

Black Friday Weller D650 Industrial Soldering Gun 2011 Deals

Nov 17, 2011 02:54:16

Black Friday Weller D650 Industrial Soldering Gun Deals
Click for larger image and other views

Weller D650 Industrial Soldering Gun

>> Click here to update Black Friday prices for Weller D650 Industrial Soldering Gun <<

Black Friday Weller D650 Industrial Soldering Gun Feature

  • Dual-heat gun produces 300 or 200-Watt
  • Nickel-plated copper secondary, heat resistant-thermoplastic housing
  • Heavy duty grounded cord
  • 2-Wire cord.
  • UL and cull listed.


Black Friday Weller D650 Industrial Soldering Gun Overview

650

Industrial Duty Soldering Gun
  • 300/200 Watt
  • Nickel-Plated Copper Tip


SAVE NOW on Black Friday offers below!

Available In Stock.

This Black Friday Weller D650 Industrial Soldering Gun ships for FREE with Super Saver Shipping.

Price : Click to Check Update Prices Please.

Weller D650 Industrial Soldering Gun

Limited Offer Today!! Weller D650 Industrial Soldering Gun Black Friday and Cyber Monday 2011 Deals

Digital Kitchen Scale Mini Led Projector Hdmi Cable 1080I

Xbox 360 3 Red Light Flashing Light Fixes You Can Easily Do

Introduction

Soldering Gun

This article will deal with how to fix the most common reason for the xbox 360 3 red flashing lights sometimes known as the "Red Ring Of Death".

Soldering Gun

The major reason for the xbox 360 red ring of death, sometimes known as RROD, is due to faulty manufacture of the main circuit board. This faulty manufacture results in poor solder joints which connect the main electronic chips to the circuit board. As the xbox 360 heats up the circuit board undergoes minute flexing and the faulty solder joints result in loss of electrical contact for the main electronic chips with the main circuit board and results in the xbox 3 red flashing lights.

The Towel Method

This is the oldest and perhaps best known of the xbox 360 3 red flashing lights do it at home fixes. Essentially the Xbox 360 is powered on whilst wrapped in a towel for a little while. The idea is that the heat generated by the xbox melts the solder and effectively eliminates bad solder problems. That at least is the theory. the reality is somewhat different. The XBox 360 is fitted with an electronic temperature regulator which switches off the Xbox before too much damage is done. So this method has been reported to work with some units but most will switch off without resolving the issue.

The Self Heating Method

This method requires that the XBox 360 is opened and the electronic thermal cut-off is disabled. The xbox 360 is then powered on for several minutes and the CPU and GPU heat up and eventually melt the solder which then reforms and repairs the faulty connectors. I like to think of this method as the xbox 360 3 red flashing lights self healing method. To see a step by step video of this process click on this link [http://www.xboxflashingredlights.docsabout.com].

The Heat Gun Method

If you have access to a heat gun then this can be employed to fix most xbox 360 3 red flashing lights problems that require re flowing the solder to fix bad connections. Using the xbox error code to determine the location of the fault. The heat gun is directed at the xbox motherboard area in question until the solder is observed to flow and the xbox then allowed to cool.

Xbox 360 3 Red Light Flashing Light Fixes You Can Easily Do
Soldering Gun

Black Friday Weller P2KC Professional Self-igniting Cordless Butane Soldering Iron Kit 2011 Deals

Nov 16, 2011 01:23:42

Black Friday Weller P2KC Professional Self-igniting Cordless Butane Soldering Iron Kit Deals
Click for larger image and other views

Weller P2KC Professional Self-igniting Cordless Butane Soldering Iron Kit

>> Click here to update Black Friday prices for Weller P2KC Professional Self-igniting Cordless Butane Soldering Iron Kit <<

Black Friday Weller P2KC Professional Self-igniting Cordless Butane Soldering Iron Kit Feature

  • Tips and accessories screw on easily
  • Includes complete kit
  • Soldering tips are iron plated for long life
  • Gas capacity allows up to 1 hour of continuous use
  • Automatic cut-off switch when cap is inserted


Black Friday Weller P2KC Professional Self-igniting Cordless Butane Soldering Iron Kit Overview

The new Portasol® cordless soldering tool from Weller® gives you the ultimate in portable power and convenience for all your soldering jobs. Slide the fuel button forward, press the piezo switch, and the tool's super-fast heat-up lets you melt solder in under a minute. The Portasol® cordless soldering tool is powerful too, adjusting from the equivalent of 25 to 75 watts for temperatures up to 850°F. Refueled with standard butane in just 20 seconds, the Portasol® P2C lasts for up to an hour of continuous use. Kit includes tool with five tips (PPT6 3/32" double flat soldering tip, PPT12 flame tip, PPT10 hot knife tip, PPT9 hot air tip, and PPT11 hot air deflector tip), sponge and tray, tool holder, storage case, and instructions. Mfg. #P2KC. Replacement tips available.


SAVE NOW on Black Friday offers below!

Available In Stock.

This Black Friday Weller P2KC Professional Self-igniting Cordless Butane Soldering Iron Kit ships for FREE with Super Saver Shipping.

Price : Click to Check Update Prices Please.

Weller P2KC Professional Self-igniting Cordless Butane Soldering Iron Kit

Limited Offer Today!! Weller P2KC Professional Self-igniting Cordless Butane Soldering Iron Kit Black Friday and Cyber Monday 2011 Deals

Powerlite Home Cinema Figures Playsets Lcd Car Headrest

Building Your Own Still - The Perfect Science Fair Project

If you are one who is searching for that perfect undertaking that will surely win the year's award for the best science fair project then don't look any further beyond constructing the simple still. For those who do not have any idea as to what a still is, it is an apparatus that is meant to distill, or separate, liquid mixtures by boiling since different liquids have different boiling points.

Soldering Gun

Before starting with the construction, it is important to note that building a still may lead one to run-ins with the law which makes it important for one to be knowledgeable of the regulations in one's area and to devote the project entirely for scientific and educational purposes.

Soldering Gun

To start the construction process of the still: the following materials are needed: a 4-gallon size copper boiler, a copper sheeting that is 18" in diameter, a copper pipe that is 36" long and 2" in diameter, a 24-inch copper tubing that is 1" in diameter, lead-free solder, glass thermometer, milk can made out of stainless steel, two reducing coupler that have the following dimensions: 1" x 1-1/2" and the other 1-1/2" x 2", an elbow joint that has a 1" diameter, a 3" nipple, 1" x 2-1/2" nipple, a large copper tub, 1-1/2" copper elbow pipe, copper coils, standard spigot faucet, any container that can be easily sealed, a siphon, an airlock, a rubber stopper, flour and water (a silicon kit can be used as an alternative), a connecting ring, yeast, a large amount of cold water, and the mixture to be fermented.

For the tools, one would need a holder gun, a drill, a saw, and a heat source.

To assemble the boiler, one would have to saw the copper boiler in half and lay on its open end the copper sheeting. Cut a piece from the sheeting that is 1 centimeter larger in diameter than the copper boiler's open end. Solder then the sheeting to the open end of the copper boiler. After this, place the boiler flat side down and drill a 2" hole on the boiler's top. Solder a connecting ring directly on top of this hole.

To construct the still's column, bore a hole on the top of the elbow connector that will be big enough for it to be soldered to the 3"-sized nipple. Soldering is also done to the 2" pipe to fasten it to the ring on top of the boiler. The elbow connector is in turn soldered to top of the pipe with the help of the 1 x 1-1/2" reducing coupler. Solder then the nipple in place after which the thermometer is inserted there and secured into place with the use of the silicon kit or flour and water. The elbow pipe is then soldered to the other coupler. The 1" elbow joint is then fastened with the end of the pipe in a way that makes the elbow point downward. This end is then soldered with the smaller nipple. The nipple is then soldered to the coiled copper tubing and the spigot is soldered into the drilled hole present on the side of the metal container. The heat source is then placed below the boiler.

Put the yeast and the fermented mixture in the container, which will be drilled with a hole just enough for a rubber stopper to make it sealed air-tight.

You are now ready to use the still. Constructing it may be a bit laborious but with the proper materials and a thorough adherence to the right steps of building it, the still is just the thing for that science fair competition.

Building Your Own Still - The Perfect Science Fair Project
Soldering Gun

Black Friday Weller D550PK 120-volt Professional Soldering Gun Kit 260/200 Watts 2011 Deals

Nov 15, 2011 00:48:04

Black Friday Weller D550PK 120-volt Professional Soldering Gun Kit 260/200 Watts Deals
Click for larger image and other views

Weller D550PK 120-volt Professional Soldering Gun Kit 260/200 Watts

>> Click here to update Black Friday prices for Weller D550PK 120-volt Professional Soldering Gun Kit 260/200 Watts <<

Black Friday Weller D550PK 120-volt Professional Soldering Gun Kit 260/200 Watts Feature

  • Fingertip trigger selects high (260-watts) or low (200-watts) for controlled output
  • Designed with pistol grip for comfort and ease of use
  • Features twin lights to illuminate your work
  • Heats up quickly; ready to use in only 6 seconds
  • Includes an assortment of accessories in a molded plastic storage case


Black Friday Weller D550PK 120-volt Professional Soldering Gun Kit 260/200 Watts Overview

Soldering Gun Kit 260/200W Soldering Gun With Tin Plated Copper Tip 2 Untinned Tips fluxbrush Soldering Aid Tool Coil 40/60 Rosin Core Solder Plastic Carry Case Soldering Hints Booklet.


SAVE NOW on Black Friday offers below!

Available In Stock.

This Black Friday Weller D550PK 120-volt Professional Soldering Gun Kit 260/200 Watts ships for FREE with Super Saver Shipping.

Price : Click to Check Update Prices Please.

Weller D550PK 120-volt Professional Soldering Gun Kit 260/200 Watts

Limited Offer Today!! Weller D550PK 120-volt Professional Soldering Gun Kit 260/200 Watts Black Friday and Cyber Monday 2011 Deals

Clock Ipod Dock Drill Sander Vitamin Info

How Does Solar Power Work?

The basics of solar power.

Soldering Gun

Solar power is probably the cleanest, most viable form of renewable energy available and it can be used in several forms to help power your house. Many gardens now use solar lights or solar garden water features. The availability and wide use of solar power in gardens shows exactly how versatile it is as a source of energy. The technology and the systems are becoming smaller, more compact and better looking than when they were first created and used. Early examples of solar power systems can be seen in California where, in the 1980s, enough solar power panels were installed to power over 10 million homes.

Soldering Gun

How do photovoltaic tiles work?

Simply put photovoltaic tiles and other forms of solar energy work by converting some of the energy in sunlight into a clean form of electricity that can be used in our houses. The PV cells consist of a positive and a negative slice of silicon placed under a thin slice of glass. As the protons of the sunlight beat down onto the PV cell they knock the neutrons off the silicon. The negatively charged free neutrons are attracted to the silicon but are trapped by the magnetic field that is formed from the opposing fields. Small wires on the silicon catch these neutrons and when connected in a circuit an electric current is formed.

This reaction gives Direct Current electricity though, and it must be passed through an inverter to be converted into an Alternating Current used in our homes to power any electrical items. Some of the power is lost in this part of the process as the inverter is only around 95% efficient but this is a much greater efficiency than was once available.

The nature of the PV cell means there is little or no maintenance required and there are no moving parts; this means that a typical PV cell can last up to 40 years with no work besides an annual clean.

How can I use them to power my house?

There are several ways to use solar power around the house and not just for powering. You can use it to heat your hot water, heat your pool or even your central heating or if you have plenty of roof space and a reasonable amount of sun you can get a grid tie system; a grid tie system means that not only can you power your entire house but during those times when you create an excess of electricity you can sell it back to the grid. An efficiently solar powered home will be able to reasonably create between 75 and 100% of their own power and because of the grid tie system this means you may not have to pay for electricity ever again.

How Does Solar Power Work?
Soldering Gun

Bose Ipod Sounddock

Interested in Solar Power for Residential Homes? Read These Ideas for Building Solar Panels!

Do you wish you could get a break from high electricity bills? Are you having trouble saving money because of rising energy costs? Not only is electricity becoming more and more costly, the process of burning fossil fuels is harmful to the environment. Is there any way to harness "clean" energy and save money in the process?

Soldering Gun

There is! You can learn how to harness solar power for residential homes. There are packages available which include blueprints, instruction plans, step-by-step guides, how-to videos, etc. You can learn how to build solar panels for less than 0. You can harness sunlight and have it converted into electricity. This will help slash at least half of your monthly electric bill!

Soldering Gun

Here are some facts about solar power for residential homes.

Photovoltaic cells are the main component of solar panels. These cells capture energy from the sun, which will later be transformed into electricity for your home. You can order them on the internet in bulk. Most sellers offer a package of 36 3x3 cells for less than 0. Sometimes you can find damaged ones on sale. Some damaged solar cells work just fine, and only have small flaws.

Tools that you will need for creating solar power for residential homes include sheet copper, shears, a wide mouth jar, electric drill, sandpaper, AC power inverter, alligator clips, soldering gun, wire cutters, plexiglass, caulk, volt meter, and protection glasses.

You'll need to install a good deep cycle battery that can withstand constant recharging. A battery is required as a solar panel component because it keeps all of the stored energy. Since sunlight isn't available 24/7, some energy needs to be stored so that your home can receive electricity on cloudy days and during the night.

Everything should be attached securely. The solar panels need to be able to withstand all weather conditions, including storms. Some people find it efficient to seal the solar cells to plexiglass with silicone caulk. Just make sure that you use the right amount of caulk - you don't want it bubbling in front of the cells. Leave a small amount of space between each cell. They need a little "breathing" room in order to function properly.

You might want to get some practice building small panels before you build large ones. You'll just need six cells or so to create a small panel that provides electricity to objects such as a CD player. Take it outside to the part of your property which receives the most amount of sunlight. If the CD player works, then you'll know that you built the panel right! Apply the same techniques to a much larger panel so that you can get electricity for your entire home.

Solar power for residential home is most effective when no shadows fall on the panels between 9 am to 4 pm. It's important that you find a good location for installation. Shade can actually damage the cells, so you need to be careful with where you put them. Some people install solar panels on their roofs. If you don't have a lot of property, this might be your best option. If you live in the Northern Hemisphere, install the panels so that they are facing south. If you live in the Southern Hemisphere, install them so that they face north.

Interested in Solar Power for Residential Homes? Read These Ideas for Building Solar Panels!
Soldering Gun

Black Friday 100W 5pc Soldering Gun KiT: Cutter:Flux:Solder:Case 2011 Deals

Nov 12, 2011 23:34:59

Black Friday 100W 5pc Soldering Gun KiT: Cutter:Flux:Solder:Case Deals
Click for larger image and other views

100W 5pc Soldering Gun KiT: Cutter:Flux:Solder:Case

>> Click here to update Black Friday prices for 100W 5pc Soldering Gun KiT: Cutter:Flux:Solder:Case <<


Black Friday 100W 5pc Soldering Gun KiT: Cutter:Flux:Solder:Case Overview

Brand New 100 Watt Soldering Gun Kit 110 Volts / 60 HZ Power: 100 Watts 2 Extra Cutters Container of Flux Tube of Solder/Wire Gun has light bulb for easy viewing during solder Includes a Blow Mold Carry Case


SAVE NOW on Black Friday offers below!

Available In Stock.

This Black Friday 100W 5pc Soldering Gun KiT: Cutter:Flux:Solder:Case ships for FREE with Super Saver Shipping.

Price : Click to Check Update Prices Please.

100W 5pc Soldering Gun KiT: Cutter:Flux:Solder:Case

Limited Offer Today!! 100W 5pc Soldering Gun KiT: Cutter:Flux:Solder:Case Black Friday and Cyber Monday 2011 Deals

Cordless Tool Kit

How to Get Rid of TV Distortion

Causes

Soldering Gun

The appearance of distortion on your monitor is quite unpredictable, depending on its causes. The simplest ones can easily be remedied with programs that specialize in removing discolorations and stuck images on the screen. The more serious ones, on the other hand, involve serious repairs, which may require the replacement of some parts. To give you a clearer view, here are the causes of TV distortion:
Dropping the monitor and other physical damage Leaving the monitor with an idle screen for long hours Damage to the TV lens. Faulty TV posistor, which governs the clarity of TV images. Computer monitor may be too old and needs to be replaced.

Soldering Gun

The final cause in the list is relative. However, some monitors, especially frequently used ones, don't last for decades, since their parts eventually wear out. Monitors are, of course, more durable than computers, but they are also to be replaced with a newer model after some time.
Solutions

There are many ways for you to remove TV distortion, some as easy as tweaking the picture settings of your monitor while others come in the form of pricey repairs. You can do the simple solutions, since they are easy. However, if you need to tinker with the TV's internal components, better leave the job to the repairman. A slight nudge or installation errors might damage your monitor even further.
Toggle or Turn the Focus Setting Turning the focus switch or setting is your most basic solution to remove TV distortion. By tinkering with that setting, you can gradually adjust the screen's clarity until the distortion is removed. Turn the knob or toggle on the focus setting slowly, so you can get the best picture quality offered by the monitor. This comes as your first troubleshooting step, since the distortion can merely come from your child playing with the monitor or any similar scenario. Hold the Brightness and Contrast Buttons Simultaneously By holding the brightness and contrast buttons at the same time, the monitor's degaussing function is triggered. The screen, in effect, will gradually display varying colors and different levels of brightness, removing distortion in the end. The remedy doesn't always work, though. Some distortion problems require a higher level of degaussing, which is provided by degaussing programs that can be bought from software shops or downloaded from the internet. Degaussing Program Degaussing programs and lens aberration removers are specifically made to deal with TV distortion. When these programs run, they activate a diagnostic that gradually removes distortion. They are pretty effective, since they synchronize with the monitor's lens and picture-related functions. Free programs are available on the internet, most of them can be found by searching for them with a reputable search engine. The highly recommended ones, however, are bought from software shops, or even video stores. Soldering Gun Degaussing The heat emitted by the soldering gun can erase the marks and discolorations on your TV screen. Point a soldering gun, not soldering iron, at the middle of the screen. It should be close to the screen, but avoid contact. Move the gun slowly, from the center to one of the screen's edges. Return the gun to the center then do the same process with the other edges until the distortion fades. Tape Eraser Degaussing A tape eraser contains a fairly powerful electromagnet, which erodes and eventually erases TV distortion. From a foot away, switch the tape eraser on. Approach the screen, as you turn the magnet in a circular motion. Once you see the distortion, move away from the screen, maintaining the magnet's movement. The distortion, as a result, will follow the motion and fade in the process.

How to Get Rid of TV Distortion
Soldering Gun

Black Friday Weller D550PK 120-volt Professional Soldering Gun Kit 260/200 Watts 2011 Deals

Nov 12, 2011 00:19:39

Black Friday Weller D550PK 120-volt Professional Soldering Gun Kit 260/200 Watts Deals
Click for larger image and other views

Weller D550PK 120-volt Professional Soldering Gun Kit 260/200 Watts

>> Click here to update Black Friday prices for Weller D550PK 120-volt Professional Soldering Gun Kit 260/200 Watts <<

Black Friday Weller D550PK 120-volt Professional Soldering Gun Kit 260/200 Watts Feature

  • Fingertip trigger selects high (260-watts) or low (200-watts) for controlled output
  • Designed with pistol grip for comfort and ease of use
  • Features twin lights to illuminate your work
  • Heats up quickly; ready to use in only 6 seconds
  • Includes an assortment of accessories in a molded plastic storage case


Black Friday Weller D550PK 120-volt Professional Soldering Gun Kit 260/200 Watts Overview

Soldering Gun Kit 260/200W Soldering Gun With Tin Plated Copper Tip 2 Untinned Tips fluxbrush Soldering Aid Tool Coil 40/60 Rosin Core Solder Plastic Carry Case Soldering Hints Booklet.


SAVE NOW on Black Friday offers below!

Available In Stock.

This Black Friday Weller D550PK 120-volt Professional Soldering Gun Kit 260/200 Watts ships for FREE with Super Saver Shipping.

Price : Click to Check Update Prices Please.

Weller D550PK 120-volt Professional Soldering Gun Kit 260/200 Watts

Limited Offer Today!! Weller D550PK 120-volt Professional Soldering Gun Kit 260/200 Watts Black Friday and Cyber Monday 2011 Deals

Routers Power Tools Dvd Home Theatre System

A 17-year-old Soldier in Germany

I turned 17 in my second eight weeks of basic training at Fort Hood, Texas and was too young to appreciate a tour of duty in Germany. I did visit some of the sites, but most of my free time was wasted. I should have taken more leave while there and toured more.

Soldering Gun

After the troop ship landed in Bremerhaven, Germany, we loaded into a train and headed south to a small town near Frankfort, Germany. Hanau would be my home for the next two years. The cold war was building up and we were warned about riding the trains to close to the border. You could get on the wrong train headed for East Germany and it would not stop until the first station inside East Germany. And then it would be too late and it might take months for the military to get you back.

Soldering Gun

Following small arms target practice one day about an hour drive from Hanau, two of us decided to skip the target duty and hitch hike back to the barracks. Large targets would be raised for the solder on the firing line to shoot at, then you would lower the target and mark the bullet holes. If they missed the target all together, they would get a "Maggie Drawers," a red flag would be waved from the pit for everyone to see. Sometimes if you didn't care for the person on the line, we would give him "Maggie Drawers." We walked out to the main road with our rifles over our shoulders and put out our thumbs. In no time we were back at the Barracks and no one said anything, I guess that we were not missed.

The Barracks at Hanau were built by the Germans before WWII and the base was well laid out in a half circle with the motor pool and equipment on one side and the barracks on the other side. It was a short walk to the motor pool but it seemed longer when you were caring all your gear and a 30-Cal Machine Gun or the barrel of a 50-Cal. We had Red Alerts about once a month and we would jump out of bed, rush down to the arms room in the basement, grab the equipment and run to the motor pool to await further orders. Our Barracks was on the corner with a good view of the athletic fields and lower buildings. The room was also on the top corner floor. It was great except for a low support beam that ran at an angle from the floor to the ceiling. We soon learned to duck under or avoid it.

We were trained for an Atomic War if hostilities broke out. One or more of the Atomic war heads for the Honest John Missile where stored in the basement of our barracks. We always new when they were moving them, because they would warn us about taking pictures out of the windows. I did take a few pictures of the crane that lifted the war heads but not of the warheads. Shells for the Atomic Cannon where moved around all over our area and could have very well been stored in the basement as well. One end of the basement was restricted and we had our classroom and arms room in the other end. There were rumors that we also had Atomic rounds for the 8 inch and 155 mm guns, but I never knew for sure.

B Battery, 3rd Armored Division 2nd Howitzer Battalion, 73rd Artillery, consisted of six 155mm M109 self-propelled howitzers and an armored personnel carrier for Fire Direction Control. Except for direct fire practice, the artillery would be shooting blind under the control of the Fire Direction Control Center. The Fire Direction Control Center would receive information by radio from the forward observer who would be watching the rounds hit the impact area. The pack of charges for firing the 155mm shells came in a pack of seven. They would then be told what charge to use, for example a charge five would mean that two charges would be removed and thrown into the fire pit. As a safety measure, one of the gun crew would count the discarded charges and repeat out loud to avoid mistakes.

A recorder on the phone between the fire direction group and the guns, would record all the information sent to the guns, in case there was a mistake or someone misunderstood, then verification could be made. This was my job, Battery Recorder. I would ride out ahead of the battery with the First Sargent and we would align the aiming circle, a device which had a compass and a scope for sighting in different angles. We would use this to obtain the correct direction for the guns and place stakes for them to line up on when they pulled into position. Great care had to be taken to insure that all six guns were pointed in the same direction parallel to each other. You aligned the device to magnet north by looking through a hole at the end of the compass needle. The danger here was that you had to be sure that you knew which end of the needle you were looking at. If you had the wrong end, then the guns would be laid out 180 degrees and you would be shooting backwards. One of the Honest John rockets was laid out backward in Grafenwohr during practice. The rocket with just enough explosive to blow the head apart, hit a building in a nearby town. No one was hurt.

The Fire Direction Control Center consisted of two drafting tables set up in the armored personnel carrier with field telephone contact with the guns. Each table was identical except that one used a plain paper chart and the other used a topographic map. The first order of business when we set up in a new position was to zero in on a known target. We would fire one round toward the target and the observer would then give us corrections over the radio. We would bracket the target with usually only three rounds. From this information we could then aim at any other target within our field of fire. The drafting equipment consisted of a metal scale for the elevation and protractor for the azimuth. There were other calculations that determined the proper charge and weather reports that gave us the air density. This information was sent to the guns in a string of information as Charge, Elevation and azimuth. The recorder wrote down this information as it was being given to the guns.

After setting up the alignment stakes for the guns and while waiting for them to arrive, I would dig a fox hole and set up the command station for our Lt. who over saw the operation. In practice I could get away with digging a shallow hole and erect a tent or camouflage over it, depending on the weather. Two pictures of Lt. Weske and myself on the field telephone are in the 1959-1960 Spearhead year book for the 73rd Artillery, 3d Armored Division

My cousin, Anna Lell, started writing to a pen pal in Germany when she was in high school and asked if I would look her up while I was in Germany. We wrote several letters back and forth and I was invited up to Hanover when I got some leave. Hanover was in the British sector and they were not used to seeing American solders. Annamarie's father was a solder in WWII and I am not sure how he felt about his daughter seeing me. A friend of theirs owned a Hotel and they provided me with a nice room. We went to the movies, took long walks and toured Hanover. Nothing more became of the relationship and we lost touch. I am not sure if Anna Lell is still writing to her.

I also corresponded with Becky, my friend from Englewood, Tennessee while I was in Germany. It was nice to get letters from home and others while away from home. Once shortly after I arrived in Germany I took a week of leave and went camping. I did not have much money so it seemed like a good idea. I fit right in with the campers and my pup tent. The locals at the camp ground were friendly and they had a nice swimming hole.

I was not much for drinking, I might go out on the town with some of the other solders and just sit on one drink all night. However one evening I thought that I would see what it was like to get drunk. I persuaded Zink who did not drink, to go with me. Funny how we used only last names in the service and seldom first names. I guess it was because our last name was always there on the front for everyone to see. Zink took good care of me that night, I sure don't remember much and was very sick the next morning. I hated not knowing what was going on around me and I don't recall ever trying that again.

Operation Winter Shield took place in February 1960 with over 60,000 members of the Seventh Army at the Grafenwohr training grounds. The weather was cold and dry. This was the cause of a major motor pool fire at the start of the training. A returning jeep driver was refueling one night from a tanker parked in the motor pool, when a static spark started a gasoline fire. We were called out in the middle of the night to evacuate the motor pool. It was quite a sight with all the vehicles moving past the burning jeep and fuel tanker with the tires blowing and flames reaching hundreds of feet into the night sky.

One of the Batteries experienced a shell going off just after leaving the barrel of the gun. There was a road some 100 yards in front of the position and a Lt. in a jeep had a close call. We got the cease fire on the radio and listened to the excited chatter over the radio. The shell is set for an air burst by placing a tool on top of the shell and setting a dial for the correct time. There are safety limits on the dial, so it had to be a defective shell in order for it to go off that soon.

We would go to Grafenwohr about every six months for training and that summer we returned.

Gen. Colin Powell writes in his 1995 autobiography "My American Journey" about his time with the Division in 1958-60 and about the Cold War and the Army's mission in Germany.

Colin Powell was assigned to the 3rd Armored Division on December 1958, the 21-year-old 2nd Lt. joined the 2nd Battalion, 48th Infantry Regiment, at Coleman Kaserne. After a promotion to 1st Lt. and training in Grafenwohr, he related the following story. I was also in the field at Grafenwohr that fateful day. We were in the middle of a firing mission with our 155's when the radio broke open with a command to cease firing, hold all positions and maintain radio silence.

(Form General Powell's book)

While working as Louiseil's exec, I got a foretaste of what hot war could be like if the Cold War ever ignited. It was a morning after payday in the summer of 1960. Our brigade had gone to Grafenwohr for field training. The troops were to be billeted in over six hundred general-purpose tents. Our company had not yet arrived in force, but a sister unit, the 12th Cavalry, had come in the night before. Its tents were full of troops, still asleep at this early hour. I was returning from a bartering mission with another company's exec., bringing rations I had traded for back to our mess hall. My ears pricked up at an odd, whistling sound overhead. In about a nanosecond, I realized it was an artillery shell that had strayed wildly out of the impact area. I stopped, frozen, and actually saw the 8-inch round come in. It struck a tent pole in the 12th Cavalry's sector, detonating in an air-burst. The roar was deafening, followed by a terrifying silence. I dropped the food and rushed toward the blast as dismembered legs, hands, and arms thumped to the ground around me. Money from payday came fluttering to earth. Some other soldiers joined me, wading through the acrid smoke and fumes. Inside the tent, I zipped open a sleeping bag, and what was left looked like an illustration of viscera in a medical textbook. In an instant, a dozen lives had been snuffed out and more men wounded. The tragedy was later found to have been caused by human error in aligning the gun, and the battalion commander and other officers were relieved of their duties. I had seen a hundred war movies, but nothing had prepared me for the sights I saw that day.
(End of account from General Powell's book)

(Account of the accident from the History Web Site of the 3rd Armored Division)
Accidents in an actual shooting war, as well as a Cold War, are inevitable. This one, however, stands out as apparently the worst U.S. ground training accident of the entire Cold War. Just after roll-call, on a rainy Friday morning on September 2, 1960, sixteen solders were killed and 27 were wounded when a 200-pound artillery shell landed amongst them at Camp Kasserine, Grafenwoehr. All of the men were from the 3rd Reconnaissance Squadron, 12th Calvary, 3rd Armored Division. The shell, which had an incorrect charge due to human error, was fired by a V Corps Artillery unit -- Battery A, 3rd Battalion, 18th Field Artillery.

I knew exactly what happen that morning, someone misunderstood the correct charge and the round over shot the impact area. The big fear in that tent area that morning was that they all knew that usually a fire for effect would follow and that would mean six more rounds could be following the deadly misplaced round.

I tried to take a typing course during my time in Germany, I started the course three times and each time when I was about half way through the course we would pull out for field training. I never did complete the course. However the typing lessons have helped me over the years.

I took a couple of weeks leave and visited Copenhagen, Denmark. Saw a lot of museums and towers, one tower was built for a queen to ride up in a carriage had a circular ramp all the way to the top. I saw Tivoli Gardens and the Littlest Mermaid. I loved the food, they had a lot of dairy products and everyone was friendly. The bars rotated hours, at midnight half would close and another group would open. Copenhagen had a lot of night life and although I did not dance much, I enjoyed watching. I was a loaner, maybe because I was younger than the others. I took this trip and others by myself.

Near the end of 1960, the majority of our unit rotated back to the states for discharge, these were the drafted men who only had to serve two years. The enlisted who had to serve three years had to take over the operations for another six months. At the same time the Nike Missile sites in Germany were being turned over to the German Army. The men who still had the remainder of their tour to serve were transferred to units like ours who were now short of men.

I was promoted to Sp4 and placed in charge of the Fire Direction Control Center under a new Second Lt. Phelps. Even though I had received advanced training at Butzbach, Germany in January 1959 in Fire Direction, I had been acting only as the Battery Recorder up until this time. Now I had a new crew with no experience or training in the Artillery. I conducted classes, but it was hard to hold the interest of displaced men with only months left to serve. I was very cautious, remembering the accidents that had occurred I did not want any blood on my hands.

During the winter of 1960/61 we were involved in more tests at Grafenwoehr and I am proud that we completed the exercises without incident. However, were slow in performing the test. I was given an article 15 and reduced back to Private and 2nd Lt. Phelps did not get his 1st Lt. bars. I fought the article with the help of barracks lawyers, until it was almost time for me to ship back to the states. One of the guys at headquarters told me at the end that if I had not fought so hard, he could have torn up the papers and no one would have been the wiser. But it was too late at that point so I stripped off all my rank from my uniforms, except one set that I saved for the trip home. This would keep me off any picky details that were dished out along the way.

We were fortunate to fly back to the states and I had a month off to visit family, now living in Florida, before reporting for duty at Fort Lewis, Washington. I was hoping to be stationed closer to my home, however you are returned to the nearest post that you enlisted. As I enlisted in Portland, Oregon, then Fort Lewis would be where I would be discharged.

A 17-year-old Soldier in Germany
Soldering Gun

Special Price!!! Weller D650PK Industrial Soldering Gun Kit

Nov 10, 2011 18:19:49

Weller D650PK Industrial Soldering Gun Kit
Click for larger image and other views

Weller D650PK Industrial Soldering Gun Kit

>> Click here to update Cheapest prices for Weller D650PK Industrial Soldering Gun Kit <<

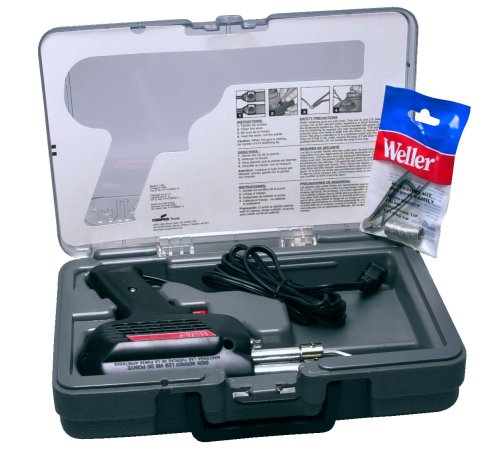
Weller D650PK Industrial Soldering Gun Kit Feature

  • Kit contains D650 soldering iron with one soldering tip and a coil of lead free solder.
  • Nickel plated tip, 2 wire heavy duty grounded cord.
  • Nickel-plated copper secondary, heat resistant thermoplstic housing.


Weller D650PK Industrial Soldering Gun Kit Overview

Reliable industrial quality tool. Heavy-duty dual-heat. Highest power output of all our soldering guns. 300 watts in high trigger (1st) position and 200 watts in low trigger (2nd) position. Features nickel-plated copper secondary, heat-resistant thermoplastic housing. Nickel-plated copper tip. Heavy duty grounded cord.


SAVE NOW on the special offers below!

Available In Stock.

This Weller D650PK Industrial Soldering Gun Kit ships for FREE with Super Saver Shipping.

Price : Click to Check Update Prices Please.

Weller D650PK Industrial Soldering Gun Kit

Limited Offer Today!! Weller D650PK Industrial Soldering Gun Kit Black Friday and Cyber Monday Deals

Optoma Digital Projector

Zoom LeBron Soldier 4

The Shoes Make the Man

Soldering Gun

The newest in the Nike Air Zoom franchise, the Zoom LeBron Soldier 4 sets a new bar from all the previous shoes from this line. Named after the rising NBA star LeBron James, the latest release of his signature shoes embody all that a basketball player can be. After all, the shoes make the man - and in this case, we now it's the truth. James himself wears these shoes to his basketball games, and we know how excellently he performs once he's on the court.

Soldering Gun

The Zoom LeBron Soldier 4 features a single strap for more breathability, a Max Air unit in the heel plus a Zoom Air unit in front. Made of patented leather, the shoes still have the King James lion on the tongue and the LJ23 logo. There's also the Dunkman silhouette which can be spotted on the back of the shoe. It also has a midsole stacked all the way up, reminiscent of the earlier Zoom LeBron 6. The usual colorways are also available, such as the white/navy/silver colorway, Cleveland Cavaliers' colors, which any Cavalier fan would be excited to own. We have yet another great example of how form and function can work together to produce an amazing design. This is a shoe that not only looks well, but plays well. You would never be afraid to take this out to an intense basketball game, because this would certainly do you no disservice in your part.

Bringing style, comfort and lightness to any wearer, the Zoom LeBron Soldier 4 is a shoe to watch out for. We can predict that these will be the shoes LeBron James will be sporting once the 2010 playoffs come around.

Zoom LeBron Soldier 4
Soldering Gun

Road Bike Manual Slow Cooker Yamaha Amplifier Receiver

Tools and Items Needed For Soldering Using a Toaster Oven

Before you start to solder using a toaster oven, you will need several tools and items. This article describes what is needed for the process, including a modification to the oven, various tools, and a description of how to make a low cost vacuum pickup tool.

Soldering Gun

The first item is the toaster oven. You can use any kind of toaster oven, but generally I would not recommend the very small ones. The medium sized ones seem to work best. Whichever one you get, it must have a glass door on the front so that you can see what is happening inside the oven without opening the door.

Soldering Gun

You will also need a digital thermometer and a thermocouple. You can buy these from your local electronics store.

The thermocouple looks like a long wire with a connector on the end. The connector end plugs into the digital thermometer outside the oven, and the other end goes around the edge of the oven door and into the oven cavity.

It is also important to have a stopwatch, so that you can monitor the time as the temperature changes inside the oven.

You will need to make the following modification to your toaster oven so that your boards don't get toasted by direct infra red radiation from the heating elements.

The objective is for the heater elements to simply heat the air inside the oven, so a direct line of infra red heat straight from the elements to the circuit board must be avoided.

The way to achieve this is to get some thin sheet aluminium and make a cut-out shape that just covers up the elements. You can use a disposable baking tray from the supermarket to make this aluminium shield.

The aluminium sheet can be attached by weaving it through one oven the oven rack slides. This will hold it in place.

Make one of these aluminium shields for both the top and bottom heating elements inside your oven.

The next item is a solder paste gun. This is the easiest way to apply little dots of solder paste to the surface mount pads for the chip components.

I use AIM solder cream, but any kind of lead based solder paste is suitable for this process. You can purchase a solder gun and solder paste from your local specialist soldering equipment supplier. I purchased these items from Okay electronic solutions here in Australia.

Now we will discuss how to make a vacuum pickup tool from a small fish tank air pump, which you can get for about ten dollars from your local aquarium shop or pet shop. I will describe the way that I made the modifications.

I removed the case of the air pump so that I could access the air inlet hole of the pump. Then I simply fitted a small plastic nozzle that I got from a syringe dispenser. Attached to that is a short length of 3mm vinyl air hose, which I got from the aquarium shop. Then another nozzle made from metal, which came from another syringe dispenser.

You can get these nozzles from your local specialist soldering equipment supplier. The nozzles generally come with some syringe dispensing kits but you may also be able to purchase them separately.

To use this low cost but effective vacuum pickup tool, simply turn on the pump and bring the nozzle down onto the top of the chip component. The component will be sucked and held onto the end of the nozzle. Then bring the chip component over to the circuit board pads which have been dotted with solderpaste. Place the component down. The solderpaste is sticky enough to grab the component and hold it in place. No vacuum release is necessary.

That covers all the items that you will need to solder using a toaster oven, including a modification to the oven, various tools, and a description of how to make a low cost vacuum pickup tool.

Tools and Items Needed For Soldering Using a Toaster Oven
Soldering Gun

Special Price!!! 100W 5pc Soldering Gun KiT: Cutter:Flux:Solder:Case

Nov 08, 2011 10:24:41

100W 5pc Soldering Gun KiT: Cutter:Flux:Solder:Case
Click for larger image and other views

100W 5pc Soldering Gun KiT: Cutter:Flux:Solder:Case

>> Click here to update Cheapest prices for 100W 5pc Soldering Gun KiT: Cutter:Flux:Solder:Case <<


100W 5pc Soldering Gun KiT: Cutter:Flux:Solder:Case Overview

Brand New 100 Watt Soldering Gun Kit 110 Volts / 60 HZ Power: 100 Watts 2 Extra Cutters Container of Flux Tube of Solder/Wire Gun has light bulb for easy viewing during solder Includes a Blow Mold Carry Case


SAVE NOW on the special offers below!

Available In Stock.

This 100W 5pc Soldering Gun KiT: Cutter:Flux:Solder:Case ships for FREE with Super Saver Shipping.

Price : Click to Check Update Prices Please.

100W 5pc Soldering Gun KiT: Cutter:Flux:Solder:Case

Limited Offer Today!! 100W 5pc Soldering Gun KiT: Cutter:Flux:Solder:Case Black Friday and Cyber Monday Deals

Lodge Cast Iron External 5.25 Enclosure Blu Ray Player Panasonic